How to Install a Mini Split Wall Bracket (Step-by-Step Guide)
Installing a mini split outdoor unit correctly is critical for performance, safety, and long-term reliability. One of the most common and professional mounting methods is using a wall bracket.
Whether you’re an HVAC technician or an experienced DIY installer, this guide will walk you through the correct process to install a mini split wall bracket safely and efficiently.
Why Use a Wall Bracket for Mini Splits?
Wall-mounted brackets are widely used across the U.S., especially in residential and light commercial applications.
Key benefits:
-
Keeps the condenser off the ground (prevents corrosion and flooding)
-
Improves airflow and system efficiency
-
Reduces vibration when properly installed
-
Easier maintenance access
For coastal areas like Florida, using a wall bracket is highly recommended to avoid ground-level moisture and salt exposure.
Tools and Materials Needed
Before starting, make sure you have the following:
Tools:
-
Drill (hammer drill recommended for concrete)
-
Level
-
Measuring tape
-
Socket wrench set
-
Stud finder (for wood structures)
Materials:
-
Wall bracket kit (with arms and mounting hardware)
-
Anchor bolts or lag screws
-
Anti-vibration pads (recommended)
-
Mini split condenser unit
Step 1: Choose the Right Installation Location
Location is everything.
Best practices:
-
Install at least 12–24 inches above ground
-
Ensure proper clearance (back, sides, top)
-
Avoid direct exposure to roof runoff
-
Make sure the wall can support the weight
Pro tip: Always verify load capacity before installation.
Step 2: Mark the Mounting Points
Use a level to ensure perfect alignment.
-
Position the bracket arms
-
Mark drilling points clearly
-
Double-check spacing and symmetry
A misaligned bracket can cause vibration and long-term damage.
Step 3: Drill and Install Anchors
Depending on the wall type:
Concrete / Brick:
-
Use a hammer drill
-
Install expansion anchors
Wood studs:
-
Use lag bolts directly into studs
⚠️ Important: Never mount only on drywall.
Step 4: Install the Bracket Arms
Secure the bracket arms tightly:
-
Use appropriate bolts
-
Check for level again
-
Ensure zero movement after tightening
A properly installed bracket should feel completely solid.
Step 5: Place the Condenser Unit
Carefully lift and position the unit.
Recommendations:
-
Use two people for safety
-
Install anti-vibration pads between unit and bracket
-
Align mounting holes
Step 6: Secure the Unit
Bolt the condenser to the bracket:
-
Tighten all mounting bolts
-
Ensure unit is stable
-
Verify no tilt
Common Installation Mistakes to Avoid
❌ Poor anchoring
Leads to dangerous failures over time
❌ No vibration pads
Causes noise and structural stress
❌ Incorrect leveling
Affects compressor performance
❌ Installing too low
Increases exposure to dirt, water, and corrosion
Pro Tips from HVAC Technicians
-
Always overspec your bracket capacity
-
Use corrosion-resistant brackets in coastal environments
-
Recheck tightness after first system run
-
Combine with proper line set support
Recommended Wall Bracket for HVAC Installations
For professional installations, using a high-quality bracket is essential.
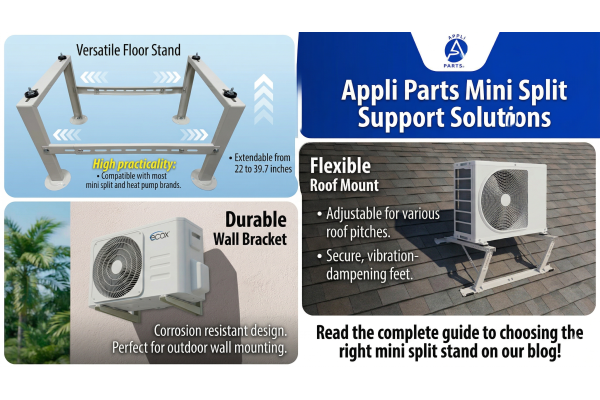
The Appli Parts Mini Split Wall Bracket is designed for durability, ease of installation, and long-term performance.
Key features:
-
Heavy-duty steel construction
-
High load capacity (ideal for most mini split units)
-
Adjustable design for different unit sizes
-
Includes complete installation kit
-
Compatible with 9,000–36,000 BTU systems
FAQs
How high should a mini split be mounted on a wall bracket?
Typically 12–24 inches above ground to prevent debris and moisture issues.
Can I install a mini split bracket on drywall?
No. You must anchor into studs or solid concrete/brick.
Do wall brackets reduce vibration?
Yes, especially when combined with anti-vibration pads.
Are wall brackets better than ground stands?
In many cases yes, especially in wet or coastal environments.
How much weight can a wall bracket hold?
Depends on the model. Always check manufacturer specs before installation.